Easy Home Projects - Part Three

Friday, November 21, 2008

Painting your front door makes a big difference in the first impression your home gives. Paint your door a color that you love like orange or red. Replace your house numbers with new modern house numbers. While you’re at it, repaint your mailbox post. You could also repaint your porch railing to make over the entry way to your home.

Even if you don’t have a room in your entry way, you can create an entry way easily. All you need to do is place a bench near the front door with coat hooks above it. Put baskets underneath that pull out for quick storage of shoes and other items such as library books. Having a bench in the entry way is very convenient as well as looking good, most people find them to be quite useful.

If you want to give a room a comfortable country style make over try putting wainscoting around the room topped with chair rail. Paint it a color that is a couple of shades darker or lighter than the wall color or go bold and paint it a contrasting color.

Laminate flooring that looks like hardwood is a breeze to install. You could do a small room in one weekend quite easily. There are also stick down bathroom floor tiles that look like tile floor. If your bathroom floor is linoleum and outdated, this could really help the look.

Check back soon for the next portion of this blog.

This blog is brought to you by occupational therapy jobs.

Easy Home Projects - Part Two

Thursday, November 20, 2008

Paint or wallpaper one wall in your bedroom a brighter color than the others. This accent wall will make your bedroom look more interesting. Wallpapers are available in practically any texture and color you can imagine, so have fun shopping around.

If you have an old dresser you’re using somewhere in your house that isn’t very attractive consider giving it a makeover. Sand it down and paint it a bright color or stain. Add polyurethane so the color will last. Add new drawer pulls that are up to date. You may even want to makeover other pieces of furniture in the same room to match.

If you dining room chairs have fabric seats you will probably need to reupholster them at some point, because the seat fabric always seems to get dingy far before the table starts to look dingy too. Choose a stylish fabric and cut it an extra two inches wide all the way around the shape of the seat. Wrap the fabric around the seat and staple it in place.

Home offices always seem to be places where clutter loves to live. Take the time to organize all of the clutter. Investing in a few matching boxes and files will help a lot. Label everything and pay attention the layout so it will be easy to put things where they belong before clutter gets the better of the room again.

Check back soon for the next portion of this blog.

This blog is brought to you by locum tenens.

Easy Home Projects - Part One

Wednesday, November 19, 2008

Large home projects are daunting tasks, and often they don’t get done. But, there are plenty of small home projects that you can easily get done in a weekend, some even in a couple of hours, that can make your home look cuter. Another good thing about these small projects is that they are mostly fairly inexpensive and can be done on a budget.

Rearrange your living room furniture. Simply rearranging a room is free of course, and it can make the room feel fresh and new. Try planning out how you want to arrange the room on paper to save the time and effort of trial and error when moving things around. Think about getting rid of any extra tables or junk you don’t need, or bring in a table or accent piece from another room if you actually don’t have enough in your living room. Make sure you put the coffee table close enough to the couch to easily set drinks on it.

Adding a small shelf at eye level to a wall that doesn’t have enough pizzazz can really give a room more personality. You can use the shelf to display small framed pictures and art, candles, or some other item. You can layer them a little bit for a more interesting look, or space them a few inches apart for a modern sleek look.

Check back soon for the next portion of this blog.

This blog is brought to you by physician staffing.

Merge Style and Function - Part Two

Tuesday, November 18, 2008

If you want to display your kids’ artwork, but you don’t like how it looks cluttered on the refrigerator, try a more stylish alternative. You can hang a linen covered bulletin board covered with a cute pattern or just a solid color that matches the room it is in. Hand the artwork on this with small pins. You can also hang colored string across the ceiling in rows and attach clips to it to display art work all along the ceiling.

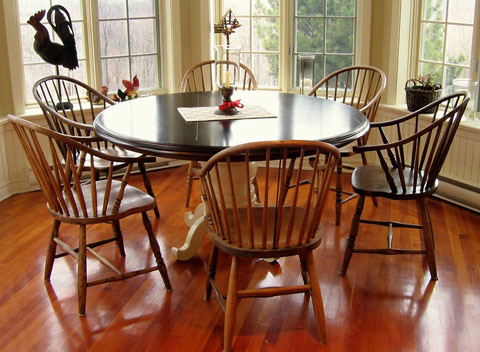
Apply the same rules to picking out a kitchen table as discussed above for coffee table selection. Also, kitchen tables that are round can be a big plus if you have a family because it will help encourage conversation. Also, the less corners the better when you have kids in the house.

There are even paint types available today that can help you reach your design goals. Use high quality latex paint and your walls will wipe clean easily. Use magnetic primer under your paint and you can display art directly on the walls. Try a chalkboard paint in a kid’s room or a play room if they like drawing with chalk.

Carpet is probably not the best choice if you have a family. A spill can turn into a stressful cleanup that ends up staining. Hardwood flooring or even a laminate that looks like hardwood, can stand up to messes and look great at the same time.

Get a big cupboard for your living room or playroom and fill it with labeled baskets. These baskets can be used to store toys and can be easily organized. If you get cute wicker baskets you could even store them on shelving and the room would still look nice. Benches are good in playrooms or kids’ rooms too, because you can put baskets underneath for extra storage.

This blog is brought to you by nephrology jobs.

Merge Style and Function - Part One

Monday, November 17, 2008

There are several things you can do to help your home look stylish when you have kids with products that will stand the test of abuse. Some of these tips can help organize and reduce clutter but they also look good.

Have a bench in your entryway. This will be where all shoes get removed. You can place a couple of baskets underneath the bench in which shoes can be stored. You can get a cute rug to go under the bench that will gather the dirt and help contain it.

Keep a basket at the landing of your stairs. Use it to hold things that you know you’ll need to take upstairs or downstairs. This way you can keep surfaces in your home clutter free without having to run up and down the stairs to put away each item individually.

Take care when you pick out your coffee table. Coffee tables tend to get dinged up quickly, so you should make sure you choose a table that is durable. If you are going to go with wood, choose a hard wood like oak and choose a table that has been polyurethaned. Steer clear of glass coffee tables, not only could they be broken during roughhousing, but they show finger prints much more easily than wood does.

Leather is a good choice for upholstery because you can wipe it clean. Leather tends to look better as it gets older too, which you can’t say about other upholstery materials. Leather is quite durable and should be able to hold up well if you have kids and pets.

Check back soon for the next portion of this blog.

This blog is brought to you by locum tenens.

Decorate with Ornaments

Friday, November 14, 2008

Christmas tree ornaments can be used creatively in a variety of ways for decorating, and the best part is the low cost.

Buy two medium or large clear ornaments and remove the metal part on top that attaches to a hook. Fill the ornaments at least half way with spices to use in hot chocolate or egg nog. One could be filled with ground nutmeg, and the other could be filled with ground cinnamon for example. Other options would be vanilla or chocolate powder, whatever you’d like really. Now, cover the openings with squares of cheesecloth. Secure the cheesecloth around the opening with silver or gold string.

Large clear ornaments can also be used to fill with bright candy, peppercorns, popcorn kernels or any other bright colored small food item. Tie bits of ribbon to the loops meant to use hooks in for hanging.

Use small sized festively colored ornaments for decorating the fridge. Tie two together using red ribbon, and hang them over a metal fridge clip that is clipped to a holiday photo or card.

Small ornaments also look cute used as decorations on cupcakes, one small ornament per cupcake.

You can make a cute centerpiece for a table using ornaments stuck on wooden skewers displayed in a vase. Use pieces of your Christmas tree in between ornaments.

Small ornaments can be tied in pairs around napkins with cute ribbon to create unique place settings for parties. Write the guests name who is to sit in each place on small pieces of paper and slip the pieces into clear ornaments, one for each pair in a setting.

This blog is brought to you by dialysis nursing jobs.

Inexpensive Do It Yourself Decorating Idea

Wednesday, November 12, 2008

Since most of us are trying to save money right now, I thought I would post a few do it yourself home decorating projects. These are all inexpensive projects that you can save money doing yourself. Do it yourself projects can end up being a lot of fun too, and the results will be creations you made, so you’ll feel more sentimental about them than if you had simply purchased the work from a store.

Artwork to adorn your walls with can be quite expensive. Not only are even prints expensive to buy, but they’re even more expensive to frame. Fortunately, there are some creative do it yourself alternatives.

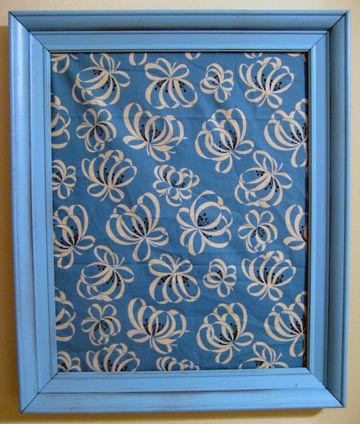
Framing a piece of fabric can look nice. Just use a matting board for a border in a contrasting color. You can make this into a series if you prefer, framing matching fabrics or maybe fabrics that match in texture but differ in color.

Framing dried plants and flowers can look very pretty. Use a colorful mat board to hot glue them to. Another option is to make a colored photocopy of an arrangement of leaves and flowers and frame that.

Take a trip to the thrift store or to a used book store. Find books with pictures you like inside and use them to frame. You can get more creative and make a collage of several if you like. Try adding some text too and spraying over it in a clear coat before framing.

This blog is brought to you by physician staffing.

All About Candles – Part Five

Monday, November 10, 2008

Certain candle scents are often used in particular rooms. For example for kitchen use people favor vanilla based smells which would include plain vanilla, but also scents such as cookie dough or birthday cake, two of my personal favorites. Other baking scented scents are popular in the kitchen too, such as cinnamon, mocha, gingerbread, hazelnut, brown sugar, apple pie, pumpkin, and coffee. People tend to use floral or fruity scented candles in bathrooms such as lilac, lavender, rose, jasmine, gardenia, or citrus and apple cents.

Smells are thought to have a powerful influence over our moods. Aromatherapy is the use of scent for psychological and physical health. You may want to try to burn candles that will have a certain affect on you. The smell of clove is said to make people feel courageous. Orange is a smell that encourages optimism. Eucalyptus is said to encourage mental focus. Happiness and harmony are supposed to be encouraged by lemon, orange, rose, sandalwood, ylang ylang, honeysuckle, coconut, jasmine, vanilla, patchouli, and lavender. If you’re often tired try burning jasmine, lemon, patchouli, peppermint, sandalwood, pine, or clove candles.

Candles can be a great way to accessorize, but they aren’t for everyone. People with small kids or pets might consider whether the candles will get knocked over and become a fire risk. Candles shouldn’t ever be left burning when you aren’t at home, and candles also shouldn’t be burned near anything that could catch fire.

This blog is brought to you by physical therapy jobs.

All About Candles – Part Four

Friday, November 07, 2008

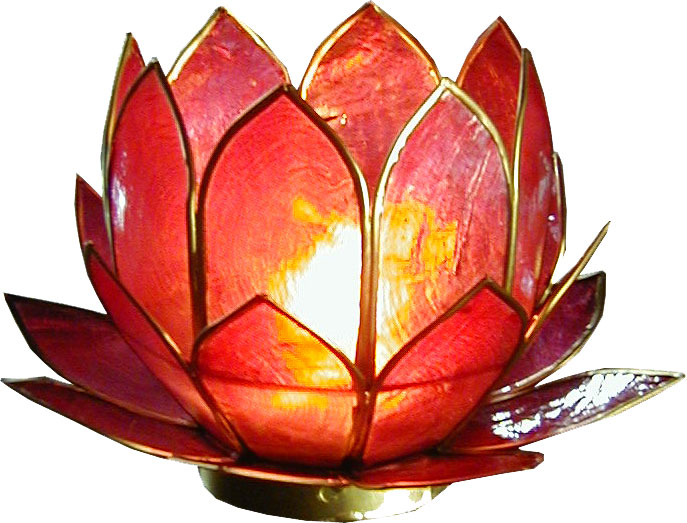
Tea light candles are quite small. These are cylinder shaped and are only about one inch tall and one and a half inches in diameter. These candles usually come already poured into a metal holder. There are many ornamental type lamps that use this type of candle.
This type of candle is also used in candle diffusers, which are used to infuse oil scents into the air. They have a space for a tealight above which is a small bowl that scented oil is poured into.

The types of candles you choose and the way you display them will affect the style that they give your home. If you group candles together you’ll create a more dramatic feeling. Two taper candles in candlesticks on the dinner table will provide a classic romantic style. Colored votive candles in glass containers lined up on your mantle will offer a cozy feeling. You can achieve an Asian style by grouping a few pillar candles of varying heights and neutral colors together on a pillar plate and filling the plate around the candles with black or neutral colored stones.

There are a few things you can do to ensure that your candles last as long as possible. You should store candles in a cool, dark and dry place. Candles stored in bright light will fade over time. Thin candles should be stored laying flat, otherwise they may warp. Running hot water over a candle is an easy way to remove candle drippings from their sides.

This blog is to be continued. Check back soon for the next section!

This blog is brought to you by rehab jobs.

All About Candles – Part Three

Thursday, November 06, 2008

Pillar candles are usually about three inches in diameter and are often perfect cylinders, but they can also be square, hexagonal or another odd shape as well and still be called pillar candles. These candles stand on their own just fine, but you wouldn’t want to burn them without a candle holder because was will drip down the sides of these candles as they burn and onto whatever they are sitting on. It is popular to put three pillar candles of different sizes together on a decorative holder shaped like a plate or shallow bowl. Then you can fill the bowl with rocks or other decorative materials. This can make a nice centerpiece for a kitchen table or a coffee table if you have extra space on your coffee table.

There are a lot of candles that come in a jar or other type of container, often glass but sometimes ceramic, metal, or some other type of material. These candles usually come with lids, which can be nice if you store your candles so they don’t get covered in dust. These are my favorite types of candles for actually burning, this is because the container keeps the wax contained so it eliminates mess. These types of candles are probably the most popular type of candle and they come in pretty much every color, shape and size that you can think of.
This blog is to be continued. Check back soon for the next section!

This blog is brought to you by dialysis nursing jobs.

All About Candles – Part Two

Wednesday, November 05, 2008

Taper candles are tall thin candles, usually six to eighteen inches tall. These candles are meant to be held in a candle holder. Taper candle holders can be found in a great variety of colors and styles. You can get double or triple candle holders that fasten to the wall, or you can get stands to hold these candles. You can also get simple single candle holders for them that are very elegant.

Taper candles can be a great way to decorate, because you can choose some really cool candle holders for them. However, actually burning them may prove to be messy depending on the type of candle holder you select. If you have a holder that hangs on the wall over carpet and the candle wax drips it could ruin your carpet. Also if the candle holder does not hold the candle completely securely a small bump could cause the candle to fall and cause a fire hazard. I find that these candles are great for decorating, but not the best type for actually burning.

Votive candles are small cylinder shaped candles, typically about and a half inches in diameter and two or two and a half inches tall. These are made to be burned in a cup. These are the size candles that are often used in religious ceremonies. These are nice because they are quite cheap and the cups to burn them in can be reused.

This blog is to be continued. Check back soon for the next section!

This blog is brought to you by dialysis jobs.

All About Candles – Part One

Tuesday, November 04, 2008

Now that Halloween is over you may be thinking about how you’re going to decorate your home where your Halloween decorations were. Candles are an easy and inexpensive way to decorate. Candles are great for the colder season because they lend a nice glow and warmth to a room, as well as an appealing scent. Candles also add style and charm to a home. Candles are also extremely easy to get in a large variety of colors and shapes to match any décor. There are many types of candles available, and I thought I’d go over the types and what to look for and avoid in candles.

Gel candles can be very unique and pretty. They are made out of a soft gelled mineral oil substance. Decorative wax items can be put into these candles before they harden, which leaves a lot of room for creative design. For example, wax strawberries might fill the glass container before the clear candle substance is poured in, resulting in a candle that looks like strawberry preserves. I think these candles can look really cool, and they are especially nice if you really want to be obvious about seasonal decorating, since they come in many seasonal designs, for example, hearts for valentines day.

Specialty candles are those that are actually sculpted to look like a three dimensional object. These are normally not burned, but used purely for decoration.

This blog is to be continued. Check back soon for the next section!

This blog is brought to you by dialysis nursing.

Decorate Beautifully AND Have Pets – Part Four

Thursday, October 30, 2008

Hard durable flooring is ideal for pet owners. Sealed stone, hardwood, or vinyl flooring will hold up well. If you do choose to have carpeting, get the cut pile variety. Loop pile carpet can be snagged and unraveled by a rowdy pet. An alternative to carpeting is buying several stylish area rugs. These can be cleaned easily, unlike carpet, where the carpet padding can never be fully cleaned if an animal has an accident on the carpet. Just don’t buy rugs that are too expensive, if you do you’ll be stressed out about them getting dirty. Carpet tiles of the sort often used in commercial spaces are another way to go if you want to have carpet. This way, if one square gets dirty, you can pull it up and replace it.

Brushing your pets often can really lessen the amount of hair that ends up in your home. I bought a brush called the furminator that works great on my dogs, I get a lot more hair off of them than I do with a regular brush.

Giving your dog plenty of treats is another way to help keep your furniture looking nice. If they have appealing things to chew on, they’re less likely to chew on your stuff. I go to thrift stores and stock up on small stuffed toys for my dog a couple times a year, much cheaper than buying very similar stuffed toys at a pet store.

This blog is brought to you by dialysis nursing.

Decorate Beautifully AND Have Pets – Part Three

Wednesday, October 29, 2008

If you’re a big sucker like me, and you like your animals to live in the lap of luxury, consider getting a fashionable piece of furniture just for your pet. If you can get your pet to use it instead of the human furniture, you’ll have a lot less couch cleaning to do. Leather bean bag chairs are a good option that I’ve seen dogs fall in love with. This same idea goes for cats too, if you buy a piece of cat furniture with a little cubby in it or a platform up high where they can lounge they won’t sleep on your furniture as much. I made my cat a little hideaway under an end table and he sleeps there faithfully every day. If you do allow your pets on your furniture, it will probably be worth it to you to buy a small hand held vacuum. You can store it in a convenient place, such as under an end table next to the couch and even keep it plugged in. This way, it’s easy to get out and vacuum your couches often. Another option is to buy slipcovers for your couches that you can wash frequently. Slipcovers are actually in fashion right now, and they come in quite a variety of styles and fabric types.

These days there are plenty of pet accessories to choose from that will match your home. There are stainless steel food and water dishes or ceramic dishes to choose from.

Check back soon for part four of this blog.

This blog is brought to you by locum tenens.

Decorate Beautifully AND Have Pets – Part Two

Tuesday, October 28, 2008

Pick your color scheme carefully if you have pets or anticipate having them soon. Stay away from white carpeting, curtains, or furniture, they won’t be white for long if you own pets. Black fabric and upholstery shows light animal fur really well, and it can be hard to keep it all cleaned off, so try not to use very much black in your decorating. Bold or bright colors also show fur easily. The best colors for us animal lovers are soft neutrals, any color within the range from light tan to chocolate brown will stay looking nice with pets fairly well.

Don’t use flat finish paint if you have pets. When they rub against the walls (or run into the walls as my dogs sometimes do) it will be harder to clean flat finish painted walls. It is best to avoid white walls if you can. This will force you to think about your style a little bit more, and your home will probably end up looking better if you paint them colors other than white.

Your tables and end tables will need to be sturdy. Where you have animals you’ll have play and they’ll inevitably run into your furniture. Also, keeping a lot of knick knacks on your tables probably won’t work well if you are going to own pets, clutter free is best, that way there is less to be knocked over.

Ideally, you’ll have a pantry in the kitchen where you can store your pet’s food. This way, you can keep it hidden instead of having to either display it or go out into your garage each time you feed your pets.

Check back soon for part three of this blog.

This blog is brought to you by rehab jobs.

Decorate Beautifully AND Have Pets – Part One

Monday, October 27, 2008

I’m an animal lover and live with two dogs and two cats, but that doesn’t mean my house has to look worse for the wear. Sticking to a few rules when decorating your home can allow you to have a home that looks good and pets simultaneously. In fact, a home that is decorated to be durable and stylish may reduce your stress levels when guests or kids are over, you won’t have to worry about messes as much.

Stay away from decorating in fabric types that attract hair. If a fabric has any tendency to have static, it will attract animal hair like crazy. Velvet is another fabric to steer clear of, you will have a hard time keeping velvet hair free. Certain fabric types like microfiber are easy to keep fur off of. Ideally, you would choose fabrics that are close to the color of your pet’s hair to minimize visible fur on the fabric. There is a new fabric type called crypton, designed to resist stains and smells. It comes in many colors and styles and you can check it out at www.cryptonfabric.com. Leather is a good fabric choice for pet owners too. It is easy to clean and very durable. Pleather will work well too. Ultrasuede feels like real suede and is very good for pet owners too.

Check back soon for part two of this blog.

This blog is brought to you by dialysis nuring jobs.

Pumpkin Carving – Part Four

Friday, October 24, 2008

There are special pumpkin carving kits available at many stores. These kits are a lot easier to use for carving than knives that you happen to have around the kitchen, and a decent kit can usually be found for a good price. Kits usually include tiny serrated blades in several different sizes that make cutting intricate patterns easy. If you intend to really get into carving the details, having a drill on hand can make your task easier.

Candles look the most authentic inside carved pumpkins that are displayed, but the heat from the candles often causes pumpkins to shrivel and age prematurely. To prevent this, consider buying some lights meant to go inside of pumpkins. You can get lights that have tiny batteries in them so you don’t have to worry about finding an outlet. You can also get lights that flicker to look like a candle flame. These don’t usually cost more than a dollar per light, and they’re easier than candles too since you can leave them on instead of having to remember to light and blow out the candle each night.

There are a few unique things you can do with your pumpkin if you want it to stand out. You can put wax paper inside the pumpkin covering the design, this will create an opaque look when the pumpkin is lit. Tin foil inside the pumpkin across from the pattern makes the light emitted from the pumpkin look brighter.

Check back soon for part four of this blog.

This blog is brought to you by occupational therapy jobs.

Pumpkin Carving – Part Three

Thursday, October 23, 2008

Drilling holes where you will need to start each cut will make carving easier. This way, the hard work is done, and you have a nice starting point for each cut. Make sure you make the most of your carving tools by sawing with them, this is how they are meant to be used. Pumpkin carving is time consuming; expect to spend awhile on this project if you want it to look good when you are done. Pay close attention to your pattern as you cut, you don’t want to end up losing track of the final goal and accidentally sawing off a vital connector area.

When the hard work of carving the pumpkin is done, you might want to spend a few minutes working to make it last as long as possible. Place the pumpkin in a tub full of cold water, let the pumpkin fill with water and sink. Let it soak for at least a couple of hours. Add a little bleach to the tub of water to help prevent molding. This process sounds strange, but it works to firm up the pumpkin. When you remove the pumpkin from the water, let it dry off and then rub Vaseline along any cut edges. This traps the water in the pumpkin, which is what you want, because when water escapes this is what causes pumpkins to shrivel.

Check back soon for part four of this blog.

This blog is brought to you by dialysis jobs.

Pumpkin Carving – Part Two

Wednesday, October 22, 2008

Projection kits have gotten popular for pumpkins lately. To project the pattern from the pumpkin onto a wall you’ll want to carve a small pattern into the pumpkin. You also need to carve it backwards if there is any text involved, so it will project the correct direction when you are done.

Pumpkin carving can be as intricate of a process as you would like it to be depending on how complicated the pattern you select is. Many people carve a basic pattern, which will yield black where no pumpkin is carved away, and bright yellow where the carving has been done and the candle shows through. There are two other shades that can be achieved with careful carving though. The first is light orange, which will show through if you carve away all of the skin off of the front of the pumpkin and some of the meat, the more you carve, the lighter the orange will look. Dark orange will show through if you remove the pumpkin meat from the inside, leaving the skin alone on the front side.

Once you pick out a pattern that you like, you will need to transfer it to the pumpkin. First, tape or pin the pattern to the pumpkin. You can push a thumb tack through the paper along the patterns lines, you’ll need a lot of holes to see the pattern clearly. This is a lot of work, but it will be worth it when you are done and you don’t have to guess where to carve any of your lines.

Check back soon for part three of this blog.

This blog is brought to you by physical therapy jobs.

Pumpkin Carving – Part One

Tuesday, October 21, 2008

If you haven’t carved a pumpkin yet for Halloween never fear, you still have plenty of time. Even if you don’t have kids, carving a pumpkin can be a lot of fun. There is an endless supply of pattern ideas available for free on the Internet, or get creative and create your own pumpkin design.

Choosing the perfect pumpkin is very important. There are lots of shapes available, you might want a tall oval shaped pumpkin if you envision carving the long faced Frankenstein, or you might want a short wide pumpkin if you want to carve a bat with wings outstretched. There is no perfect shape for all patterns, but you can find perfect shapes if you pick out your pattern first. A pumpkin with a sturdy stem is a sign of a health pumpkin and it will also make lifting the lid off of the carved pumpkin to insert candles a lot easier.

It may seem easy to prep the pumpkin for carving, but there are a few key things to do correctly during this process. Most importantly, when carving off the lid, make sure you carve at an angle in a cone shape. If you carve straight down your lid will just fall into your pumpkin, so this is crucial. The rest of the preparation is pretty simple, just remove the seeds and pulp and you’re ready to go.

Check back soon for part two of this blog.

This blog is brought to you by physician staffing.

Decorate Your Home for a Halloween Party - Part Two

Monday, October 20, 2008

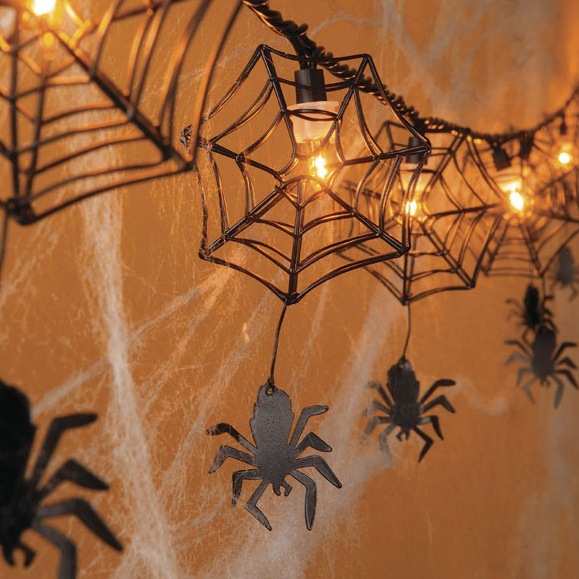
Fake spider webs are extremely cheap. You can use cotton batting if you prefer, artfully draped around your house. Make sure to buy a few fake spiders and bugs to add to your display.

Cut out a shape like a bat or a skull in black construction paper. Tape it onto a flashlight and shine the light towards a noticeable wall. This will cast a shadow in the shape of your cutout that will be a unique decoration.

Scary sound effects are easy to provide, as they are available on CD at many stores. If you place them in an entry way you might be able to surprise your guests.

Switch out some of your regular light bulbs with orange, yellow, or black bulbs for a dimmer spookier look.

A coffin can be built out of a wood frame and used for a variety of purposes. You could put a dummy inside with an arm hanging out. You could put cold drinks in coolers inside. Use your imagination here.

Scarecrows are a common fall decoration for your yard that will look good for a Halloween party.
Grave stones are definitely creepy inscribed with RIP. You can buy them, or you can cut out grey tombstones from construction paper and tape them to a wall so it looks like a silhouette of a grave yard.

Dry ice can be purchased fairly inexpensively and added to punch for a foggy atmosphere. Fog machines will do the same thing, but they’re a little more expensive.

This blog is brought to you by dialysis nursing jobs.

Decorate Your Home for a Halloween Party – Part One

Friday, October 17, 2008

If you are having a Halloween party this year make sure to decorate your home to get the guests into the spirit. There are plenty of decoration ideas, choose one or all of them for your party. Most of the materials required for these ideas can be acquired from a discount or party store.

Having a few jack o’ lanterns displayed on your front porch or around the house are vital. Carving pumpkins can be a lot of fun for you and especially for kids. There are hundreds of printable stencils available on the internet for free. If you aren’t into carving you can always paint a design on your pumpkin instead.

Candles displayed inside of the jack o’ lanterns will give the faces or designs the appropriate eerie Halloween glow. You can get dark candles and scary looking candle holders to display randomly around your house too.

Crepe paper can add a little fun to your home in Halloween colors. It is cheap and easy to decorate with. Use it as a border around the table where you are planning to have your Halloween treats displayed.

Fake blood is a creepy touch that can be easily added. You can even make your own fake blood using corn syrup, food coloring, and a touch of milk to make the blood look darker and thicker. It can be very messy of course and will stain, so use with caution. Fake blood might best be used outdoors where you won’t have to worry about it getting on your carpet and furniture.

This blog is brought to you by rehab jobs.

Dress your Home for Fall – Part Four

Thursday, October 16, 2008

Decorating your front stairs for fall can look nice. Just make sure to leave enough walking space. Use potted mums or evergreen plants surrounded by pumpkins and gourds. Rusty pots make good planters for this display, but terra cotta pots will work too. If you carve pumpkins, use your carved pumpkins here, this display will look awesome lit up with your jack o’ lantern.

If you have a bench in your front yard, don’t forget to dress it up like you did your porch.

Inside the home it is important to decorate for fall too. If you have a fireplace, take advantage of it by placing pumpkins, carved is best, one or two on each side of the fireplace. Fireplace mantles also look great decorated for wall with candles, leaves, and mini pumpkins.

There are fake pumpkins that you can buy at a craft store that will last for years. They can even be carved just like a real pumpkin.

Most of the decorating ideas in this and the past three blogs before it can be mixed and matched. Have fun with these projects and let your creative side come out. Be careful not to go overboard with your fall decorating. It can look silly to decorate every available surface in your home, and it will be quite time consuming to do so also. Make sure that wherever you stand in your home you can only see one of two fall decorations at a time.

This blog is brought to you by physical therapy jobs.

Dress your Home for Fall – Part Three

Wednesday, October 15, 2008

Get a plate in a warm color such as red, yellow, or orange. Gold looks great for this accessory if you can find it. Hot glue artificial leaves around the edge of the plate. Make sure they overlap each other. This can be used as a candle display, as placing two or three pillar candles on it will look lovely. You can do this with a smaller plate too, and just use it to display one pillar candle.

The front door of your home is a popular place to put your Fall decorations. I’m going to do a separate blog about wreaths, but there are several cute alternatives if you aren’t into wreaths.

You can find old picture that is framed at the thrift store or at a yard sale for very cheap. Hot acorns, pinecones, and artificial berries and leaves randomly all over the picture and frame, completely covering them. Finish it off by hot gluing a big bow on your decoration, this looks nice in one corner, but would look good right in the center too. Make sure the ribbon is in a fall color.

An old rake that you won’t use again can be transformed into another door decoration. Hot glue artificial leaves, feathers, and fall grasses to the rake like a bouquet and tie it off with a big ribbon.

Old crates can be found for very cheap or even free and they look great as an outside fall decoration. Place a few of them on your porch, stacking them if you want. Then, sprinkle various sizes of pumpkins and gourds inside and on top of them for a quick porch decoration.

This blog is brought to you by rehab jobs.

Dress your Home for Fall – Part Two

Tuesday, October 14, 2008

Adding a fall wreath to your front door will really make the outside of your home look ready for the season. There so many different types of wreaths than can be made fairly easily that I will write a separate blog to go over them.

Window boxes are great to use in the summertime, but are you taking advantage of them for fall decorating? It is easy to do, and it will get the exterior of your home looking very festive. You can be creative and use your window boxes for winter and Christmas decorating too. First, get a little bit of chicken wire and cut it to fit your window box like a lid. Staple it into place on top of the window box in a few places. The dirt that is already in the window boxes will hold your decorations in place. Get some small wooden skewers or small sticks to hold up your decorations. Gather tall fall grasses and cat tails to group together around the sticks and stick them into the dirt through the chicken wire. Once most of the window box is full, add colorful fall elements to it. If you would like to use the dirt for planting live plants, you can plant mums to decorate around or live evergreen plants. These plants will survive the winter well. Place small pumpkins and gourds around the grasses. Use your wooden skewers to hold the pumpkins and gourds in place. Pre-drill a hole where your skewer will go. After thanksgiving just remove the pumpkins and gourds and replace them with pine cones and a few lights.

This blog is brought to you by physician staffing.

 
Home Interior Design and Decorating Tips - by Templates para novo blogger